Add a graphic/image to a form
Supported properties
AutoSize - Yes, No. Set AutoSize to Yes to ensure that the entire image is visible within the image control. When AutoSize is Yes, the image control resizes to accommodate the image. When AutoSize is No (or blank), the image control remains the same size, regardless of the size of the image. If the image control is smaller than the image, only the portion of the picture that fits inside the image control is visible (In other words, the image is cropped). To resize the image to fit the image control rather than resizing the control to fit the image, use the ReSize property.
Container - The control that the image control "belongs" to. Every control has a container, and each control defaults to having the form as its container. Only a named Groupbox can be specified for the Container property (or blank to default to the form). When using the properties Top and Left, they are always relative to the control's container. Groupbox containers can be used to group like controls together. Note: You must always define the container before any controls that use this container.
Enabled - Yes, No. The enabled property set to "No" will automatically show the control in the "gray ghost" outline and prevent the user moving focus to it.
ExitOnClick - Yes, No. Set to Yes to exit the from via a single mouse click on the image. In addition, you can tell exactly where the user "clicked" on the image with the two system variables $_ImageClickLeft and $_ImageClickTop. Left and Top are in pixels and relative to the whole image. The top left most corner of the image will return 0 for both these variables.
File - This is the filename of an image file if the Source property is specified as File. In that case it should include the fully qualified path. If the Source property is Macro, then this filename should be a valid filename but only the filename extension is used by GSAK at run time to determine the graphics format of the image data. Valid filename extensions and image formats are .gif, .png, .jpg, .jpeg, .bmp, .ico, .emf, or .wmf. When in design mode, if the filename is an image file that exists, then it will always be displayed so as to be able to see how it will look on the form, otherwise the image control is blank. At run time the image displayed depends on the Source property.
Height - Vertical height in pixels
Left - Position from the Left, which is the number of pixels relative to the container
Name - The image control name
Resize - Set Resize to Yes to cause the image to assume the size and shape of the image control. When the image control resizes, the image resizes also. Resize, resizes the height and width of the image independently. Thus, unlike a simple change in magnification, resize can distort the image if the image control is not the same shape as the image.
To resize the control to the image rather than resizing the image to the control, use the AutoSize property instead.
Note: Resize has no effect if the image is an icon.
Source - Select "File" to have the image loaded from a file on the hard disk (as specified in the "file" property). Select "Macro" when you want to embed the image inside your macro, and use this image instead. You embed the image by mime encoding an image from your hard disk (Macro=>Code binary file). For this to work, the variable name for the encoded data should be the same name as the control (see example) Supported image file formats are gif, jpg, jpeg, bmp, ico, emf, wmf.
Spellcheck - You can only specify the name of a memo or edit control here, which will then be spellchecked when you click on the image. The sole purpose of the image will now be to spell check the corresponding control.
TabOrder - The Taborder property applies to all controls than can receive input focus and regulates the order the controls will jump to when using tab on the keyboard. This means it doesn't matter what order the controls are defined in your code - the taborder property will decide your tabbing order. Taborder is a "smart" property. For example, if you set the value of a control to say 7, then any existing control that has a tab order of 7 will automatically be changed to 8, and all higher tab numbers will be incremented by one.
Also note that the tab order is relative to the container, so controls inside a group box have their own tabbing order starting at zero. The group box itself has a tabbing order within its container as well (usually the form) Don't be alarmed if you update your form and see taborder values starting at 8. The macro form has a few "hidden" controls that take up tab slots. You can actually use any number you like for the Taborder (even zero). You just need to remember that tabbing order is respected in an ascending numerical sequence
Top - Position from the top, which is the number of pixels relative to the container
Type - The control type, which must always be "Image"
Visible - Yes, No. If set to "No" then the button will not be visible on the form
Width - Horizontal length in pixels
Example:
The following code shows how to show an "embedded" image on a form:
$exit = form($form,"") <Data> VarName=$form #******************************************************************** # Form generated by GSAK form designer on Sat 06-Oct-2007 17:13:03 #******************************************************************** Name = Form1 Type = Form Height = 159 Width = 407 Caption = Embedded image test Name = Image1 Type = Image File = mouse.ico Height = 42 Left = 133 Source = Macro Top = 31 Width = 98 Name = Label1 Type = Label Height = 13 Left = 17 Top = 43 Width = 90 Caption = Is this your mouse? Name = btnOK Type = Button Height = 25 Left = 140 Top = 86 Width = 75 Caption = OK <enddata> <data> VarName=$image1 AAABAAEAICAEAAAAAADoAgAAFgAAACgAAAAgAAAAQAAAAAEABAAAAAAAAAIAAAAAAAAAAAAAAAAAAAAA AAAAAAAAAACAAACAAAAAgIAAgAAAAIAAgACAgAAAgICAAMDAwAAAAP8AAP8AAAD//wD/AAAA/wD/AP// AAD///8AAAAAAAAHAAAAAAAAAAAAAAAAB4eHgAAAAAAAAAAAAAAAAHAAAAAAAIiIiIgAAAAAAAcAAAAA AIiIiIiIiAAAAABwAAAAAAiIgAAACIiAAAAHAAAAAACIiAd3d3AIiAAABwAAAAAIiIB3h4eHcIiAAAgA AAAAiIgHeHh4eHcIiAAHAAAACIiAd4eHh4eHcIgAAHAAAIiIB3h4iIiIeHcIgABwAAiIgHeHiIiIiIeH cIAABwCIiAd4ePiPj4iIeHeAAAcIiIB3h4+P//j4iIeHAAAHiIgHeHj4////j4iIeHAAcIiAd4ePj/// //j4iIeAAHCIB3d4+P//////j4iIcAcIgHd3j4////////j4h4AHCAd3CPj/////////j4iAcAB3cICP //////////iHAIAAdwj4////////////gABwAACPjw//////////+IAAgAB4+P/w/////////4gAAHAA d4///w////////+AAABwAHj////w///////4AAAABwAPj////w//////gAAAAAhwAPj///8AD///+AAA AAAAhwAPj//w//AP/4AAAAAAAAhwAPjwD///8AgAAAAAAAAAh3gPD/////+AAAAAAAAAAAAAAAj4///4 AAAAAAAAAAAAAAAAD4iIAAAAAAAAAAAAAAAAAAAAAAAAAAAAAAD/7///+B////f/AP/v/AA/3/gAH7/w AA+/4AAHv8AAA7+AAAPfAAAB3gAAAewAAAHoAAAB4AAAAdAAAAHQAAABoAAAAaAAAAFgAAADYAAAB2AA AAdgAAAPcAAAH3AAAD+4AAB/nAAA/84AAf/nAAP/8IAH///gD///+D///////w== <enddata> |
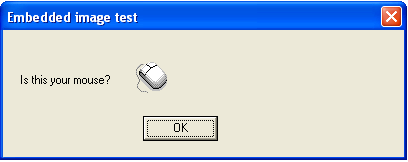
If you run this macro it should produce this screen: